

How To Convert Iphone Photo To Jpeg
Since iOS 11, your best iPhone has, by default, captured images in a format called HEIC (also known as HEIF) and HEVC for video. It's a more efficient format than the old default, JPEG, because it saves storage space with smaller file sizes, even though the quality of images is nearly identical. Even though JPEG has been around a lot longer and has more compatibility with a wider variety of software and hardware, HEIC is catching up, seeing increasing adoption over the last few years across the technological landscape.
Still, there are reasons that you might want to shoot in JPEG (or if you're more focused on video, H.264). For one, while HEIC is catching up, JPEG is a much more widely compatible format, having been around for almost three decades. And maybe you don't trust the quality of HEIC for whatever reason, so you want to stick with something more familiar.
Luckily, iOS 15 makes it easy to change photo and video formats in the Settings app. Here's what you need to do.
Tradeoffs of JPEG
While JPEG might be a more compatible format than HEIC, choosing it instead of the more efficient format has its tradeoffs. One of the chief issues surrounds video, actually. Choose JPEG also means choose H.264 for video. But if you want to use features like 4K at 60 frames per second video recording or 1080p at 240 fps slow motion, you'll need to choose High Efficiency.
How to take JPEG pictures instead of HEIC images
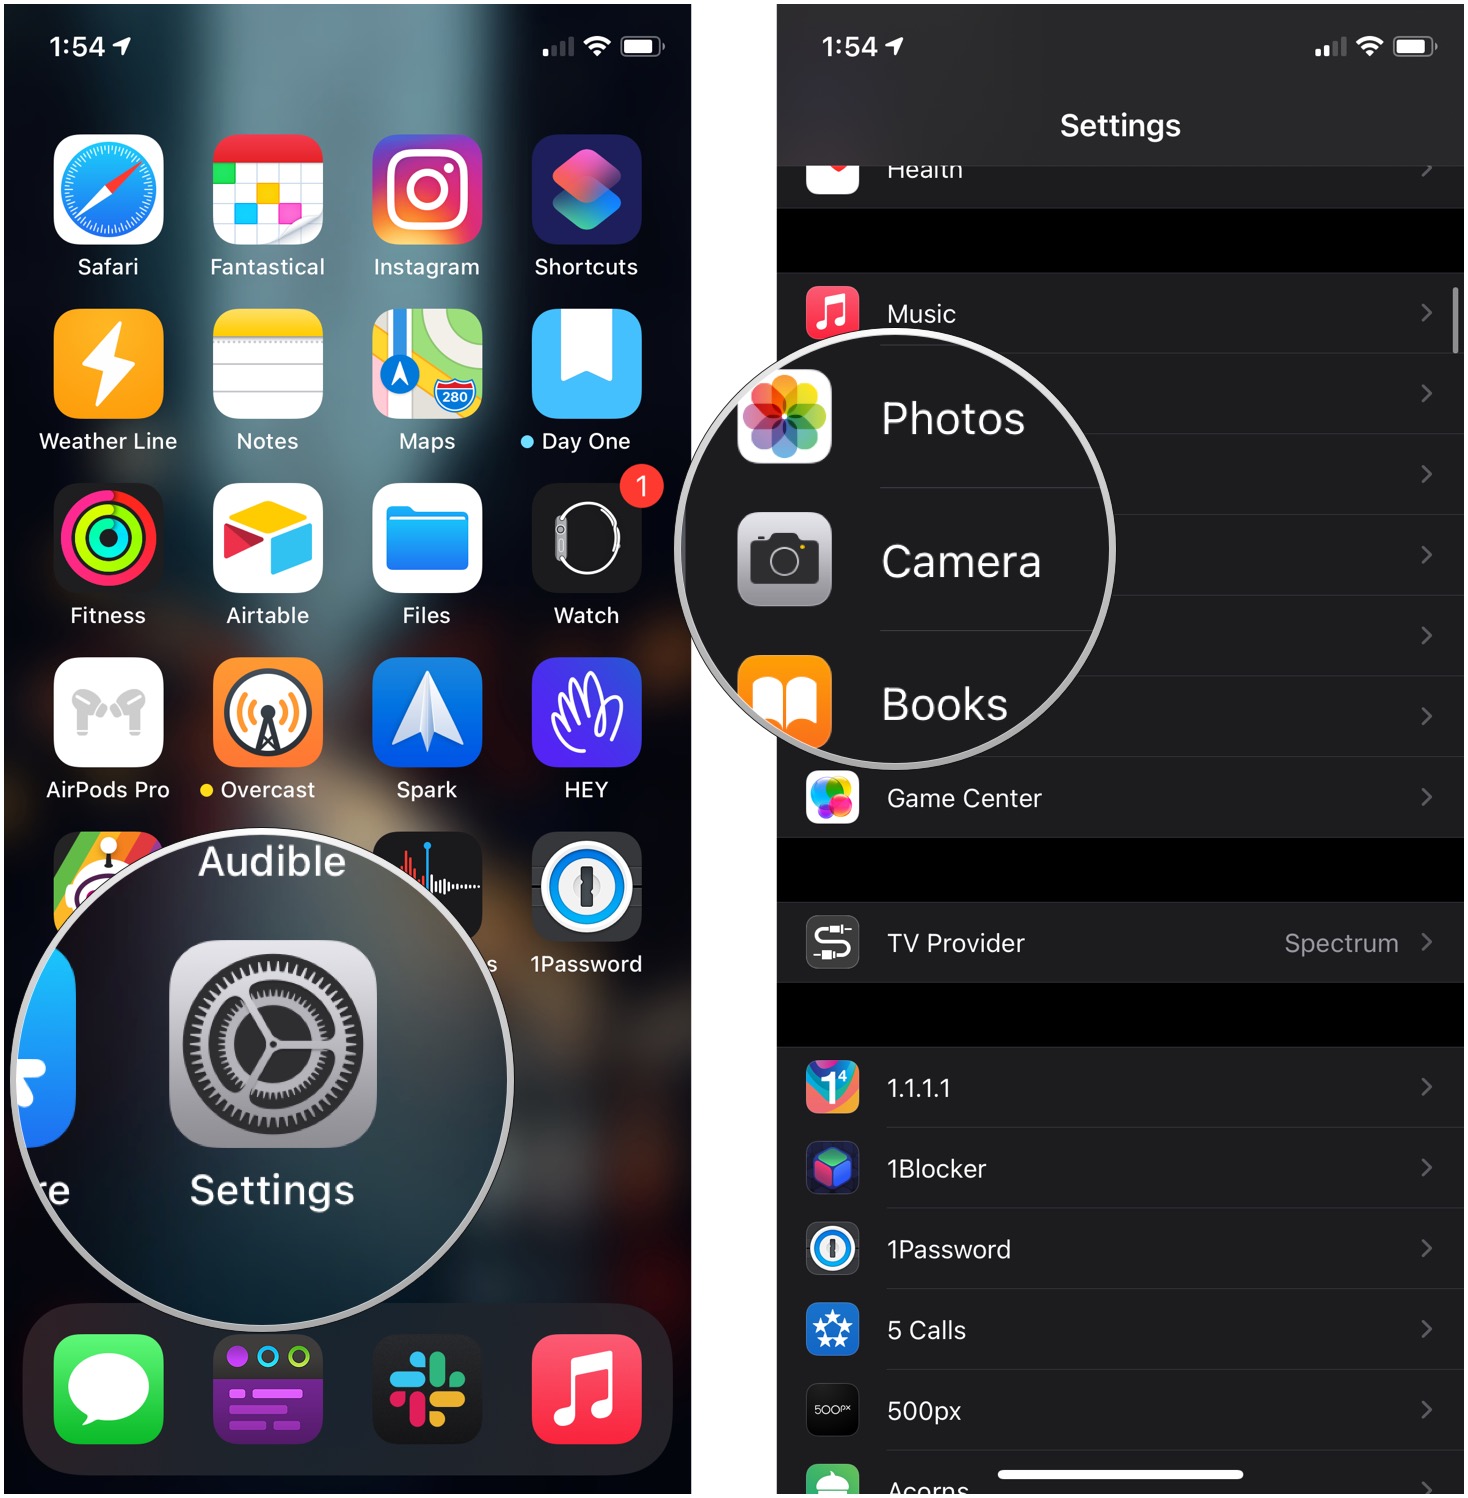
- Open Settings on your iPhone or iPad.
-
Tap Camera. You might have to scroll a bit to find this option.
 Source: iMore
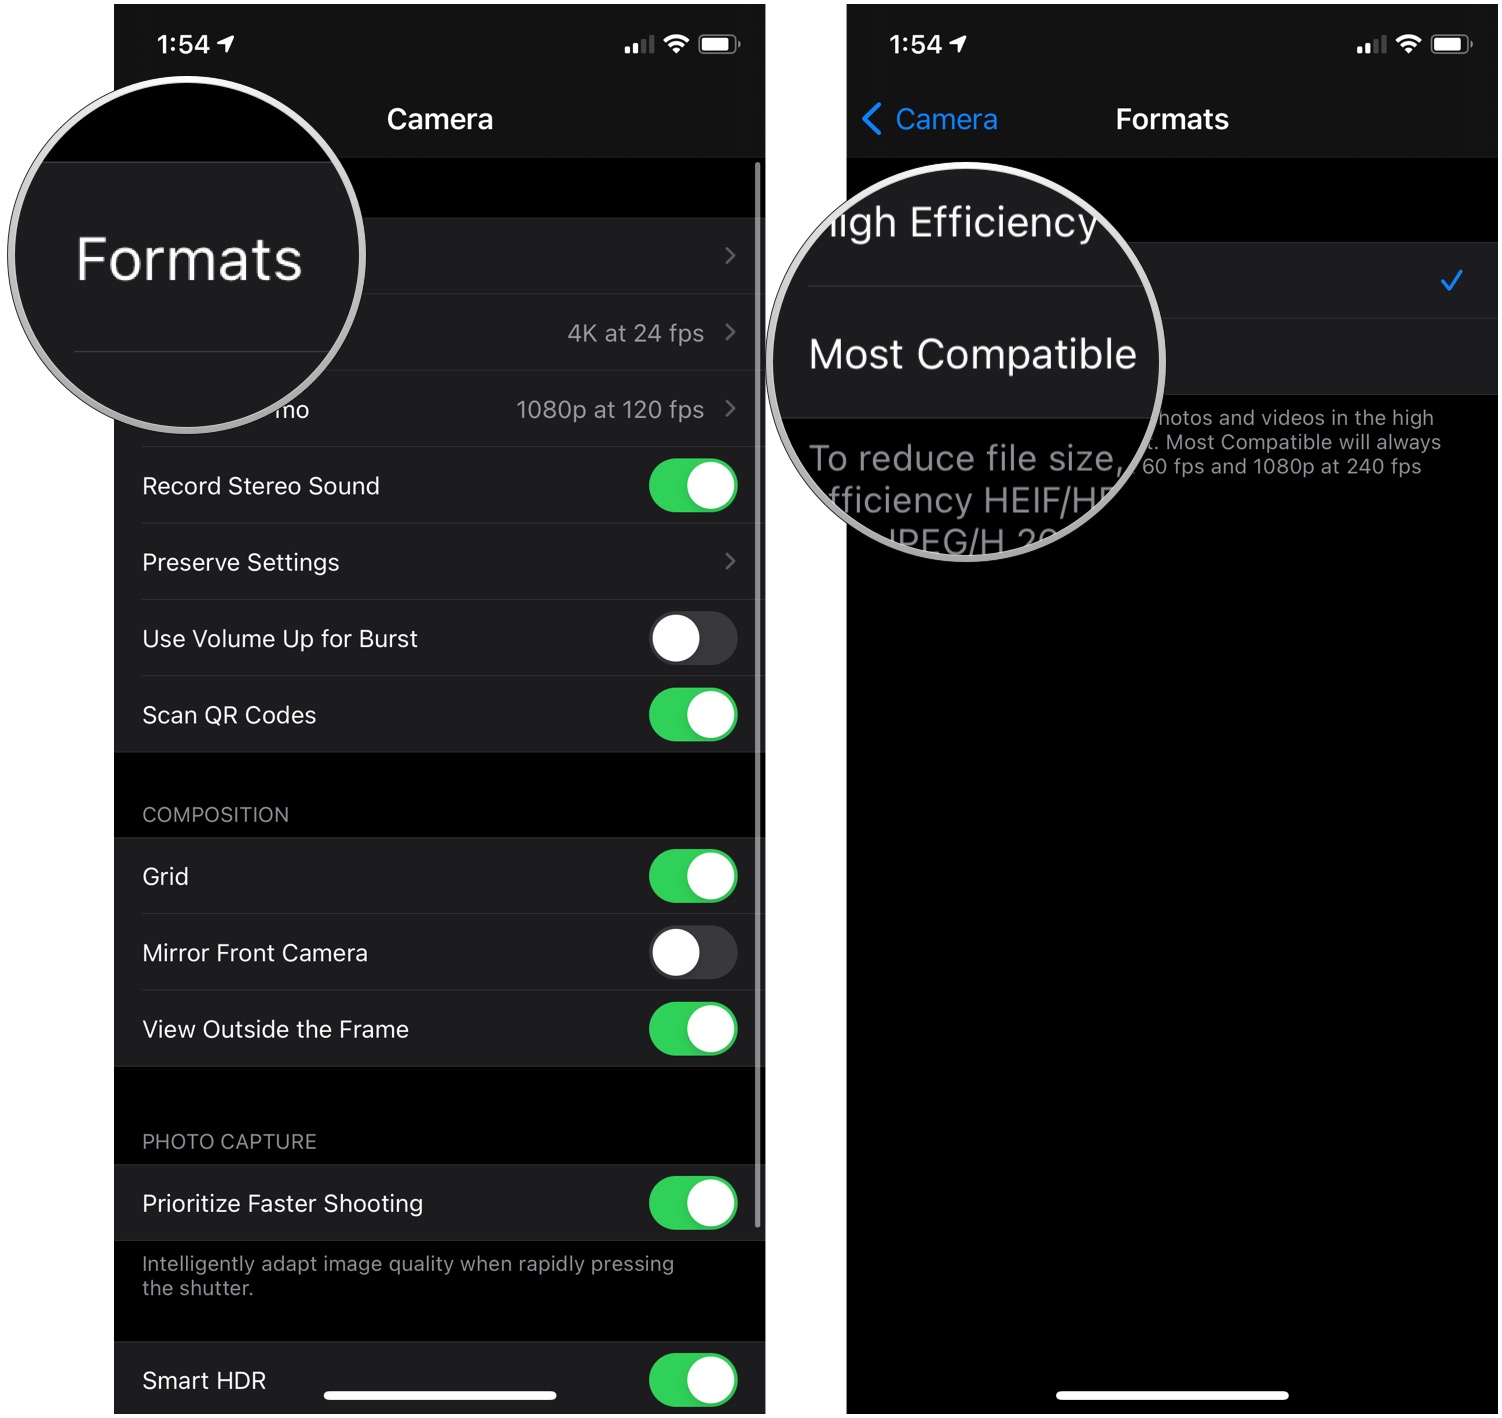
 - Tap Formats.
-
Tap Most Compatible. If you want to switch back to HEIC, follow these same steps but tap High Efficiency.
 Source: iMore


You will now be able to shoot JPEG pictures instead of HEIF photos. You'll also shoot H.264 for video instead of HEVC.
How to automatically convert JPEG photos when transferring your images to a Mac or a PC
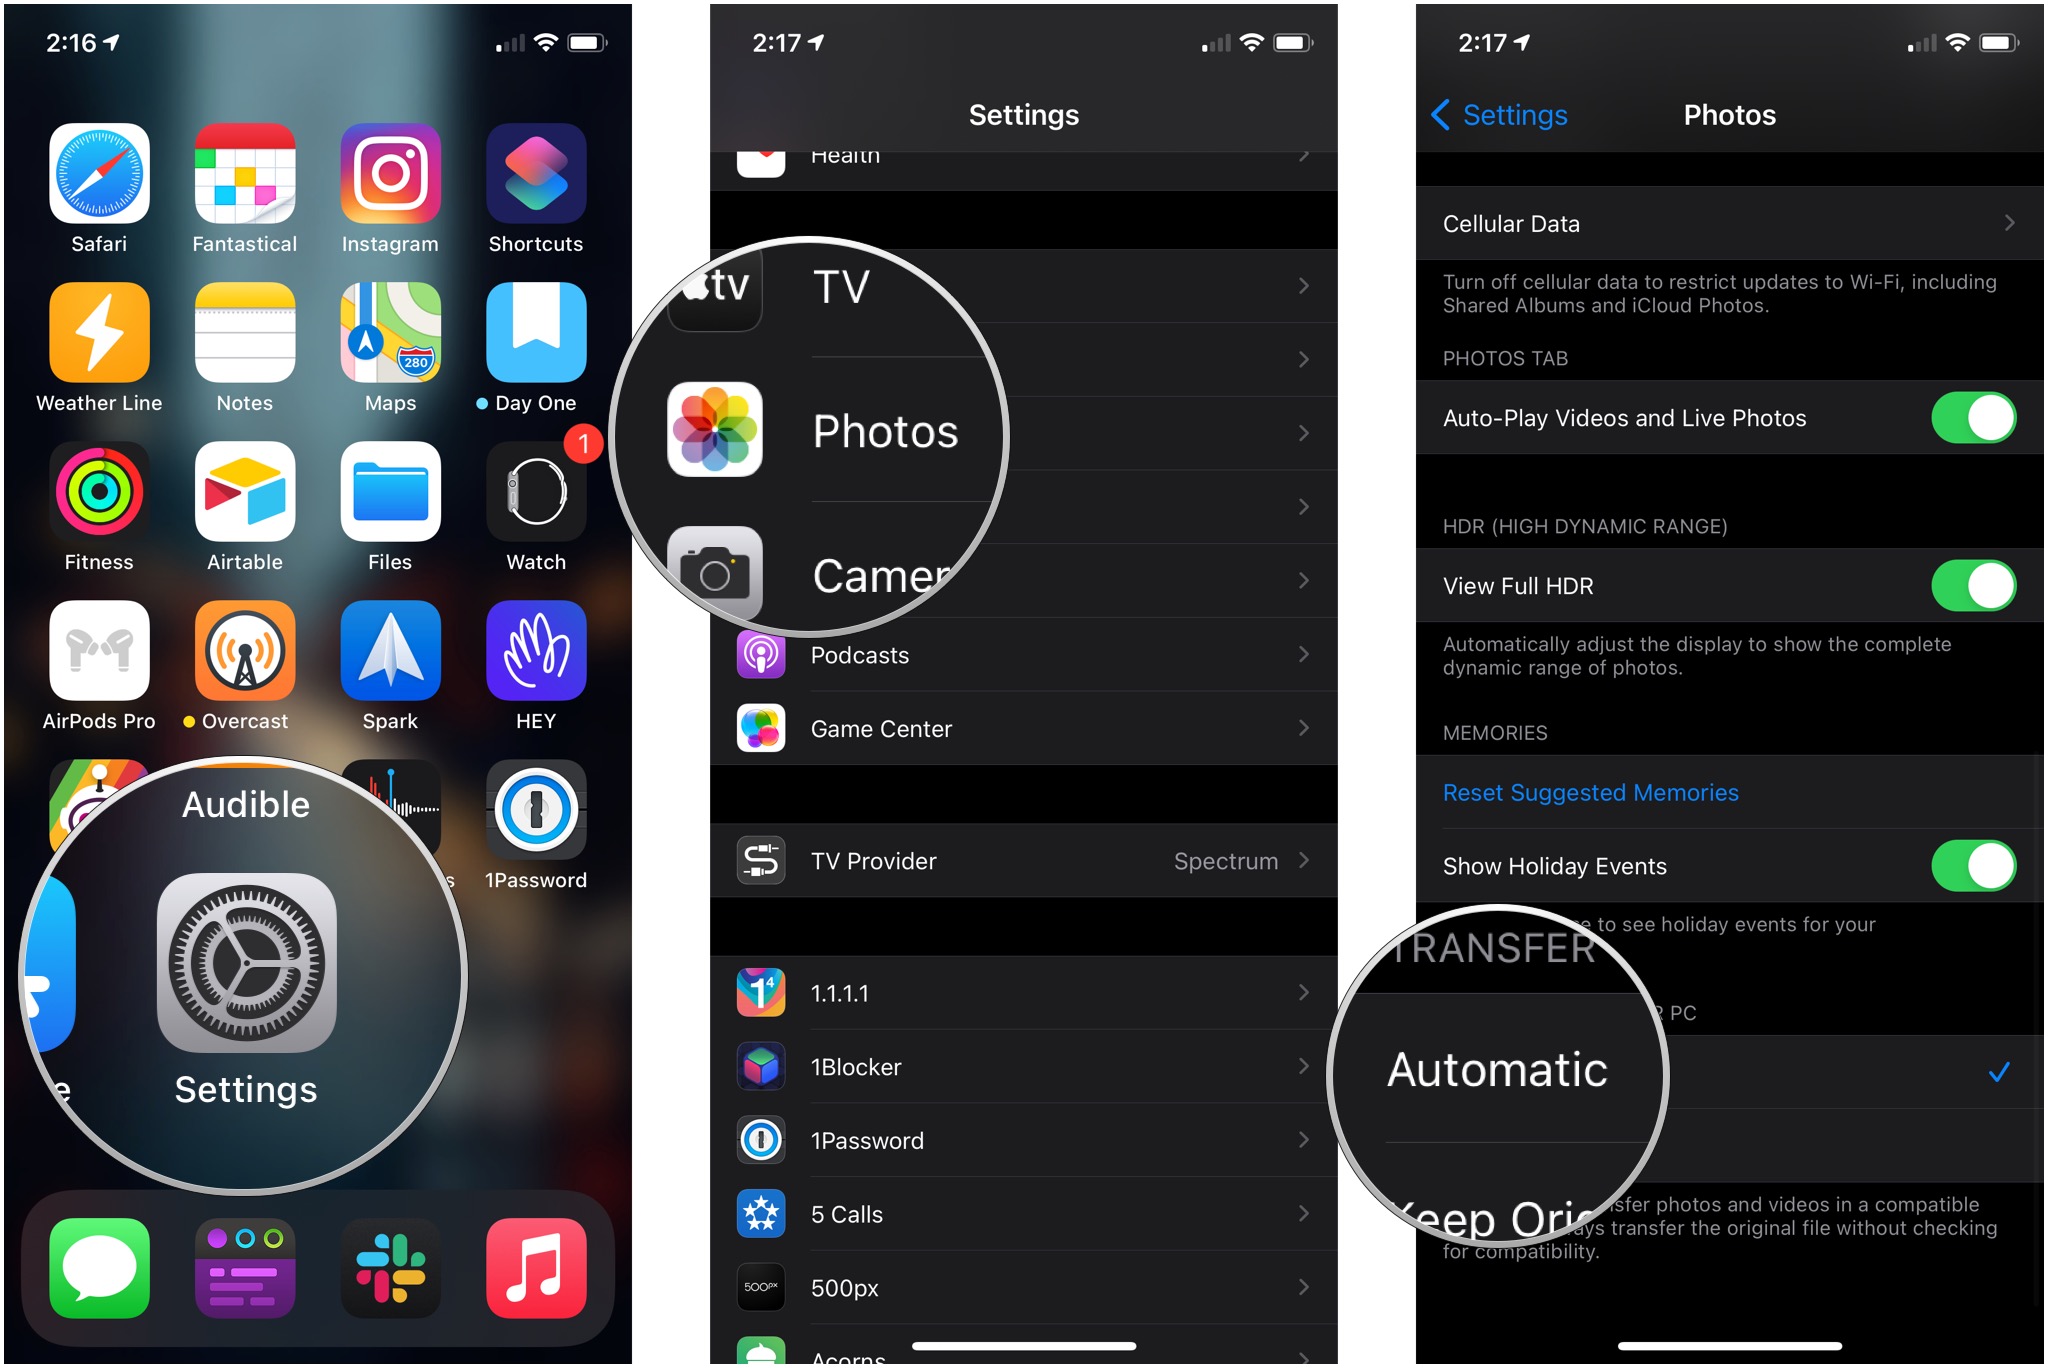
- Launch Settings from your home screen.
- Tap Photos. You might have to scroll a bit to find this option.
-
Tap Automatic. It will be at the very bottom of the screen under Transfer to Mac or PC
 Source: iMore

Now, whenever you transfer photos to your Mac or PC, they will be in JPEG rather than HEIC.
JPEGs are more compatible
If you're transferring from one Apple device to another Apple device, chances are the HEIC format Apple uses is just fine, but JPEGs are more compatible across the board. So, if you have trouble opening images from your iPhone on your PC or another device, remember to check what format you're using.
How To Convert Iphone Photo To Jpeg
Source: https://www.imore.com/how-take-jpeg-pictures-ios-11-instead-heif
Posted by: fordscance.blogspot.com
0 Response to "How To Convert Iphone Photo To Jpeg"
Post a Comment