

How To Fix Network Drivers
Wi-Fi adapter not working in Windows 10: How to fix connection issues
Passionate about all elements related to Windows and combined with his innate curiosity, Ivan has delved deep into understanding this operating system, with a specialization in drivers and driver troubleshooting. When he's not tackling... Read more
- When the Wi-Fi adapter is not working in Windows 10, you only have the wired option at your disposal unless you take action.
- Some users reported wireless connection issues immediately after a Windows update.
- The most frequently encountered cause is related to network adapter drivers.
XINSTALL BY CLICKING THE DOWNLOAD FILE
Various software and hardware-related issues may occur after a Windows 10 update. One of these problems is that the Wi-Fi adapter is not working any longer for some users.
Namely, they reported that their computers weren't even able to detect and recognize the wireless network adapter, which worked fine before. Don't worry, we have plenty of solutions for this problem.
If you can't connect when using any device to the same network, try to troubleshoot the local network, starting with your router.
We also have an excellent guide on how to detect the home network in Windows 10, in case you need assistance in that regard.
What can cause the Wi-Fi adapter to stop working?
If the Wi-Fi adapter is not working, you will either have to find an external Wi-Fi adapter to use temporarily or connect to a wired network.
Either way, you will still need to troubleshoot the problem, so let's see some common reasons for this issue:
➡ Malfunctioning drivers – Especially after an OS update you can encounter problems with the drivers that are not working properly. Updating them as revealed below will solve the issue.
➡ Improper settings – Some adaptor settings may have changed without warning and this can affect its functionality.
➡ The adapter is damaged – Although highly unlikely, if the problem coincides with a drop of your laptop, you might consider that this component is damaged.
Other related Wi-Fi adapter issues
Here are some similar issues you can also resolve with the fixes presented below:
- Windows 10 no Wi-Fi option– Sometimes, the Wi-Fi button in the taskbar may be missing. Nevertheless, you can still use the same solutions to resolve this problem.
- Windows 10 Wi-Fi adapter missing– If your computer fails to recognize the adapter, you won't be able to see it in Device Manager.
- My Windows 10 Wi-Fi disconnects frequently – If your connection is unstable, one of the solutions below will fix that too.
- Windows 10 no Wi-Fi option in settings– Just like it's the case with the taskbar, the Wi-Fi option may also disappear from the Settings page.
- Windows 10 Wi-Fi connected but no Internet– This one's the worst – when everything seems right, you just can't connect to the Internet. But don't worry, you'll be able to resolve this when applying the solutions presented below.
What can I do if the Wi-Fi adapter stops working?
- Update the network drivers (Internet needed)
- Use the Network troubleshooter
- Reset network adapters
- Perform a registry tweak with Command Prompt
- Change the adapter settings
- Reinstall the network adapter
- Reset your adapter
- Update the router firmware
- Switch to the Maximum Performance mode
- Clear any Wi-Fi disruptions
1. Update the network drivers (Internet needed)
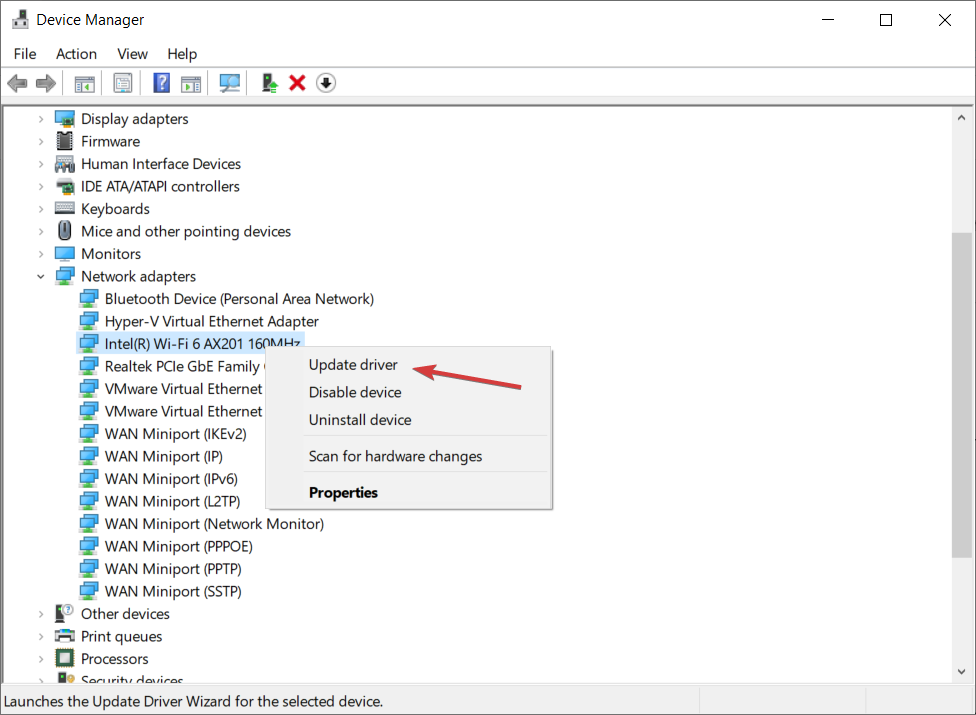
- Right click the Windows Start button and select Device Manager.

- Click on the Network adapters section, locate the Wi-Fi adapter, right-click on it and select Update driver.
- Now select the first option, Search automatically for drivers.
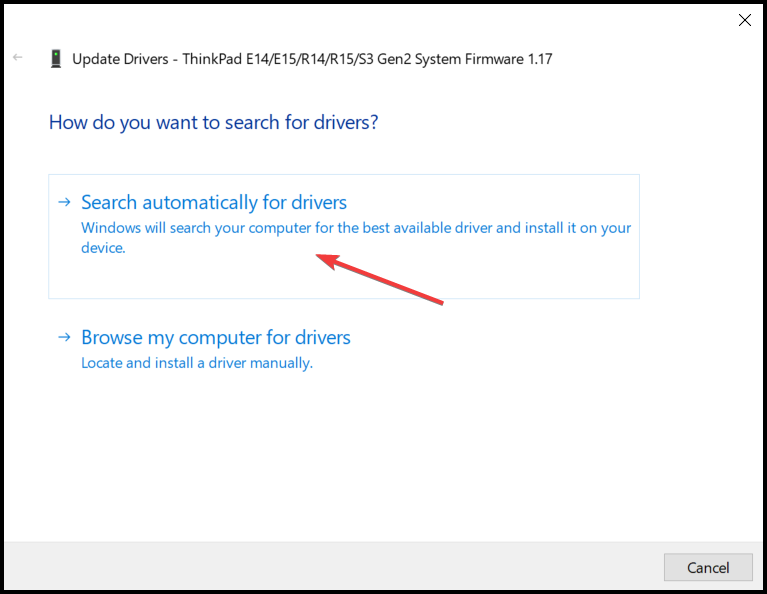
- If the system finds a new driver it will install it and you will be prompted for a restart.
- You might also get the message that the best driver is already installed and you can also click on Search for updated drivers on Windows Update.
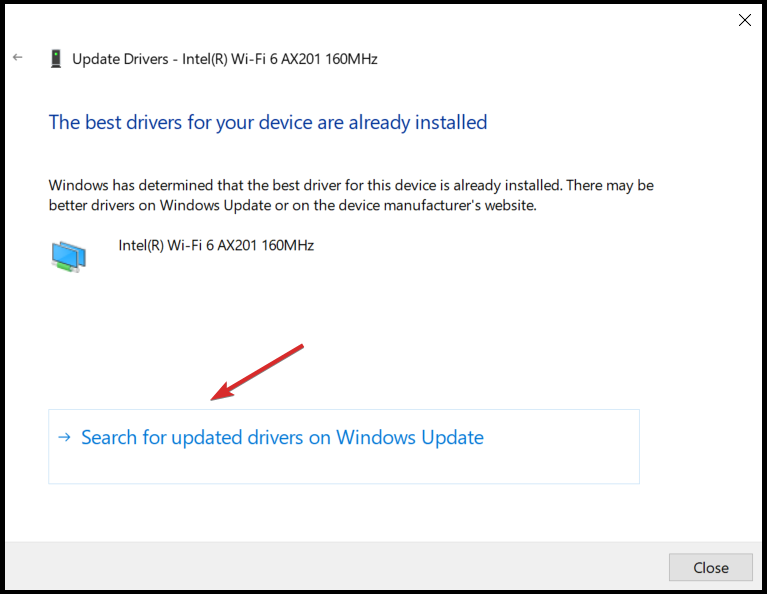
- You will be redirected to the Windows Update section where you need to click on View optional updates (If you don't have any optional updates pending, you won't see the option).
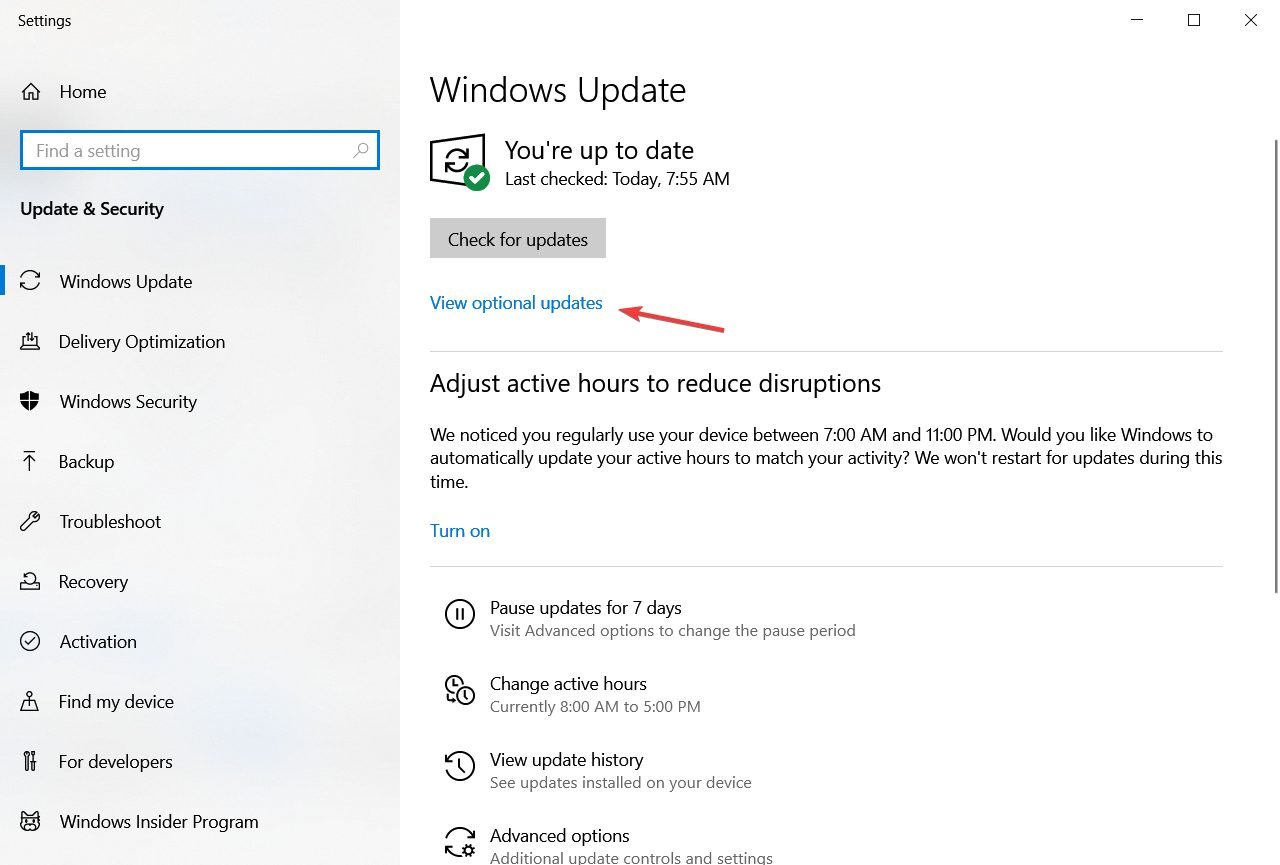
- Check the drivers you want to install, and click on the Install button below.
This solution will work only if you have an Ethernet cable connection besides your Wi-Fi. If that is not available either, download the necessary drivers from another computer or device.
To get the most suitable drivers, go to your network adapter manufacturer's website, and search for the drivers for your network adapter.
While we're at it, you might want to check some Wi-Fi adapters to seamlessly blend with your Windows 10 infrastructure.
Now download the drivers, transfer them to your computer, and begin the installation process. Hopefully, a fresh set of network drivers will resolve the problem.
If you want to skip the hassle of searching for drivers on your own, you can use a driver updater tool that will automatically do this for you.
⇒ Get Driverfix
Of course, as you're not able to connect to the Internet at the moment, this tool won't be useful. However, once you get online, it will help you keep all your drivers up to date, to prevent such situations from happening again.
2. Use the Network troubleshooter
- Press the Windows key + I to open Settings.
- Head over toUpdates & Security.
- Select Troubleshoot from the left pane and click on Additional troubleshooters.
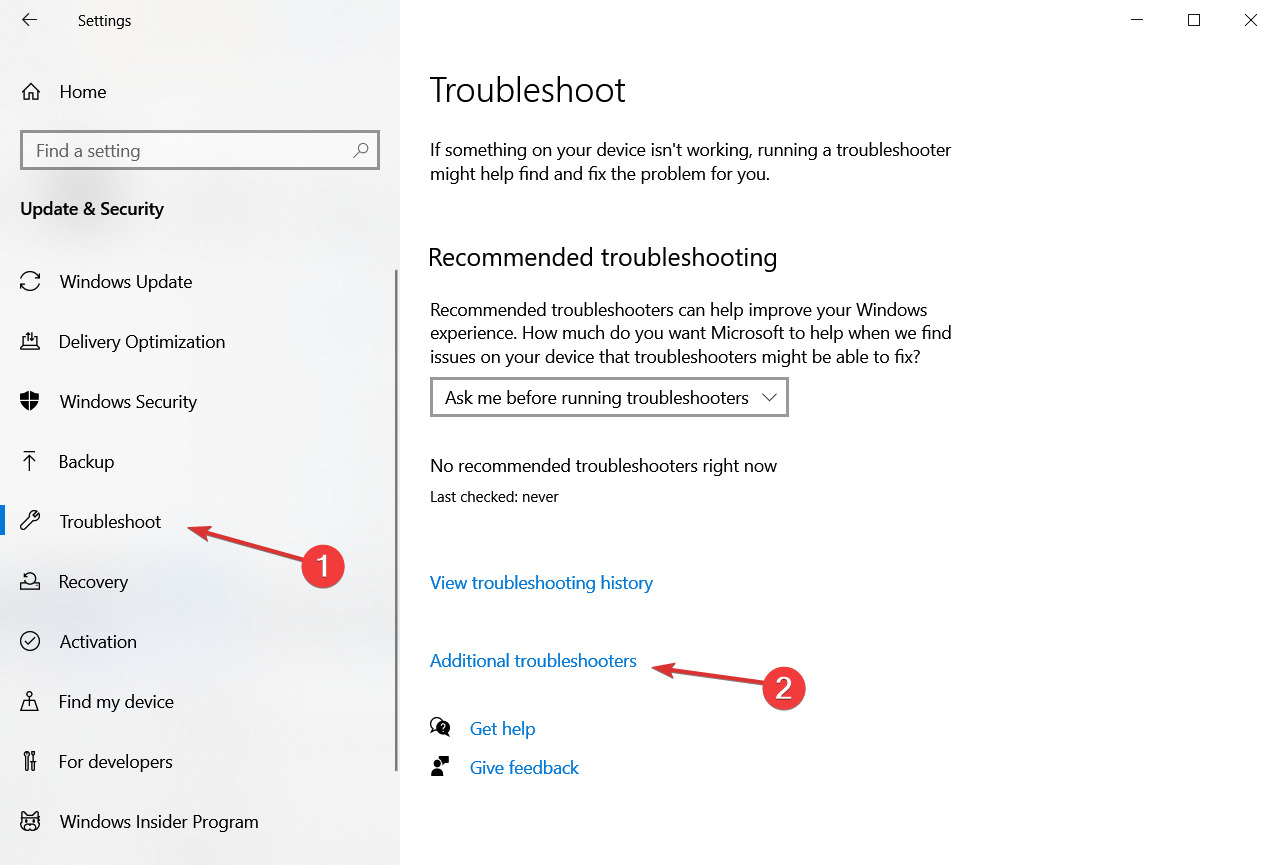
- SelectInternet Connections and click theRun the troubleshooter button.
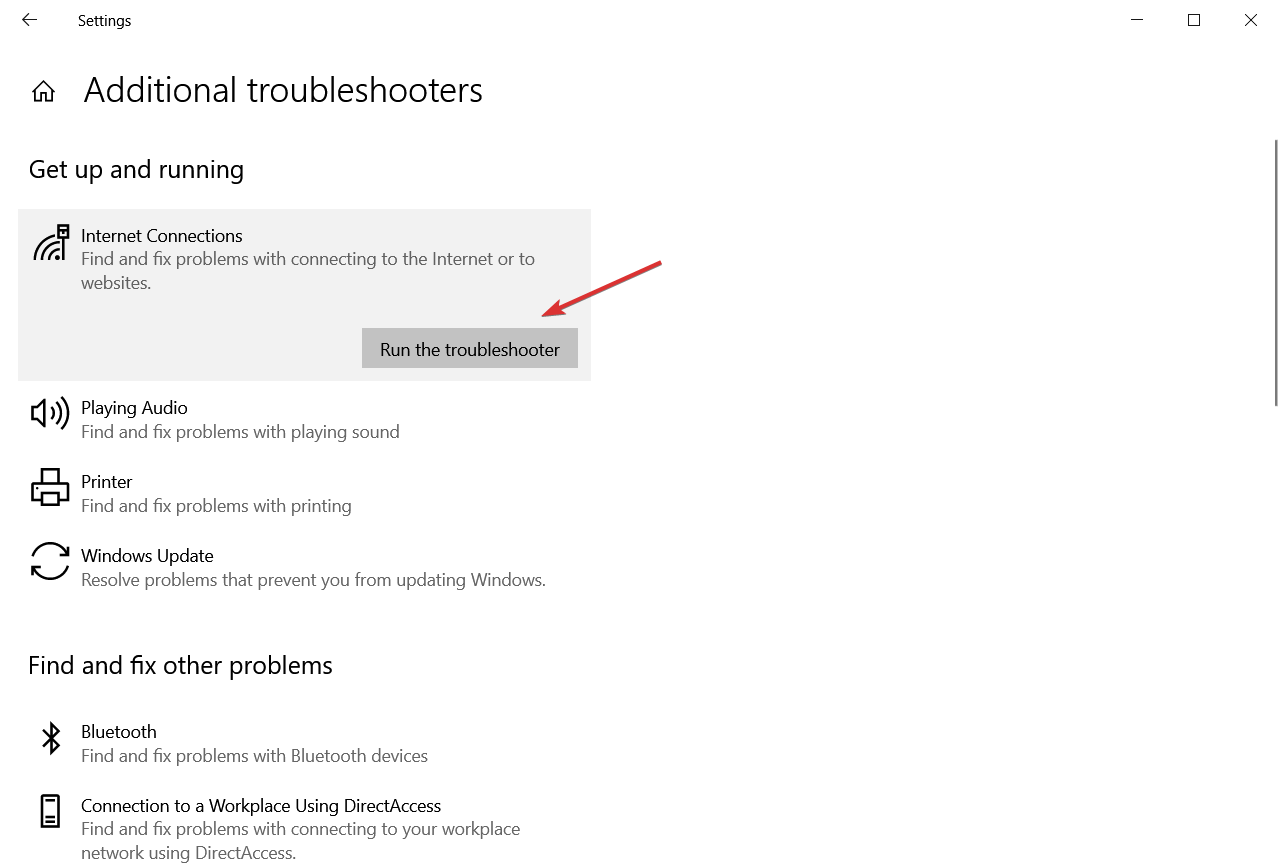
- Follow further on-screen instructions and let the process finish.
- Restart your computer.
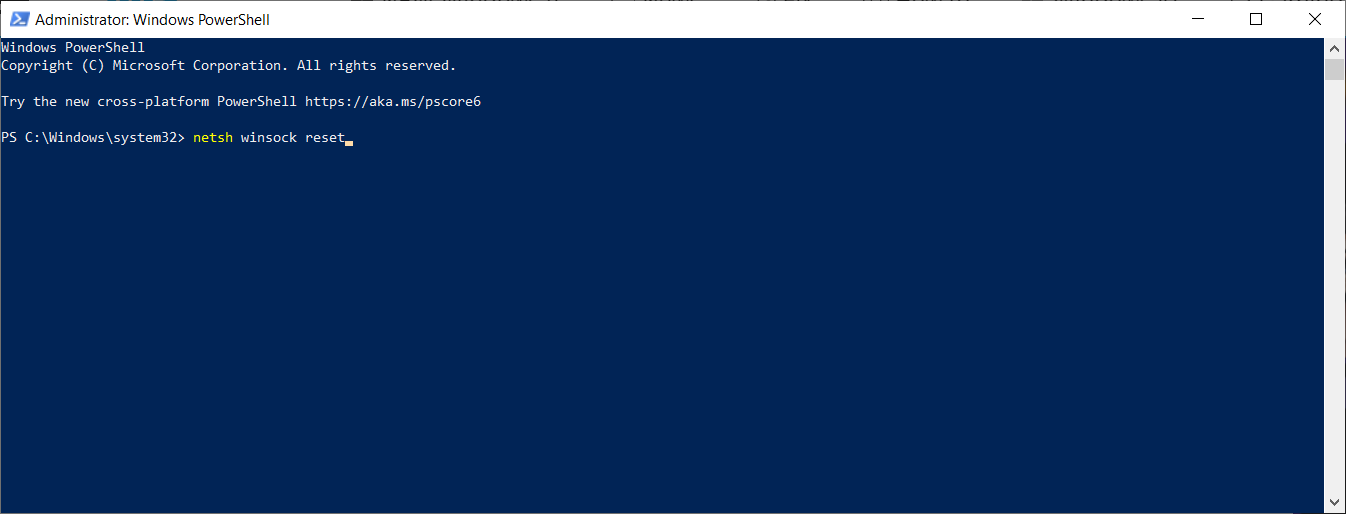
3. Reset network adapters

NOTE
Resetting the network adapter can be very effective but keep in mind that this procedure will erase saved Wi-Fi passwords and Bluetooth connections. Note down the passwords and settings before applying the below steps.
- Right-click on the Start Menu button and choose Windows PowerShell (Admin)
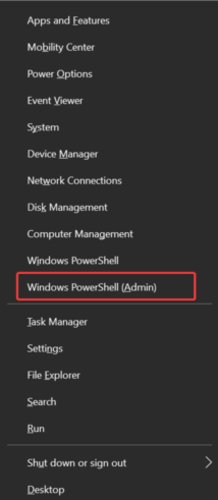
- Type or paste the following lines into Windows Powershell and press Enter after each one:
-
netsh winsock reset -
netsh int ip reset -
ipconfig /release -
ipconfig /renew
-
- Restart your computer and see if you're able to connect to Wi-Fi now.
4. Perform a registry tweak with Command Prompt
- Type cmd in Windows search and click on Run as administrator to start Command Prompt with full privileges.
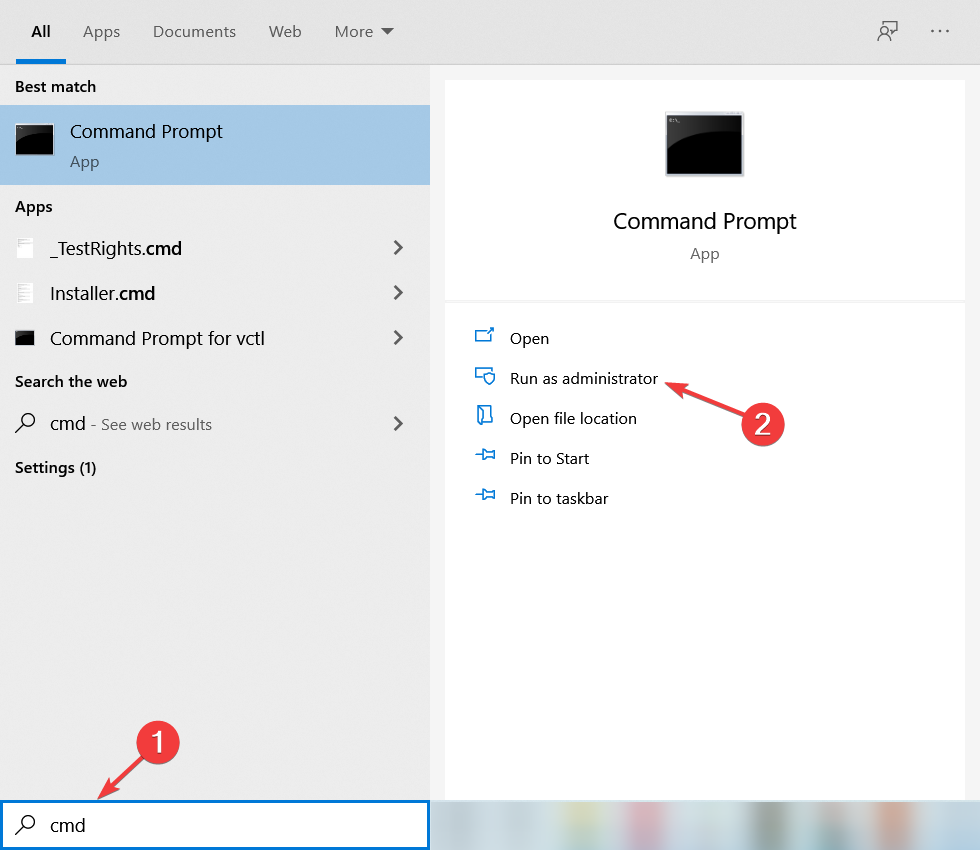
- Paste the following line and press Enter:
netcfg –s n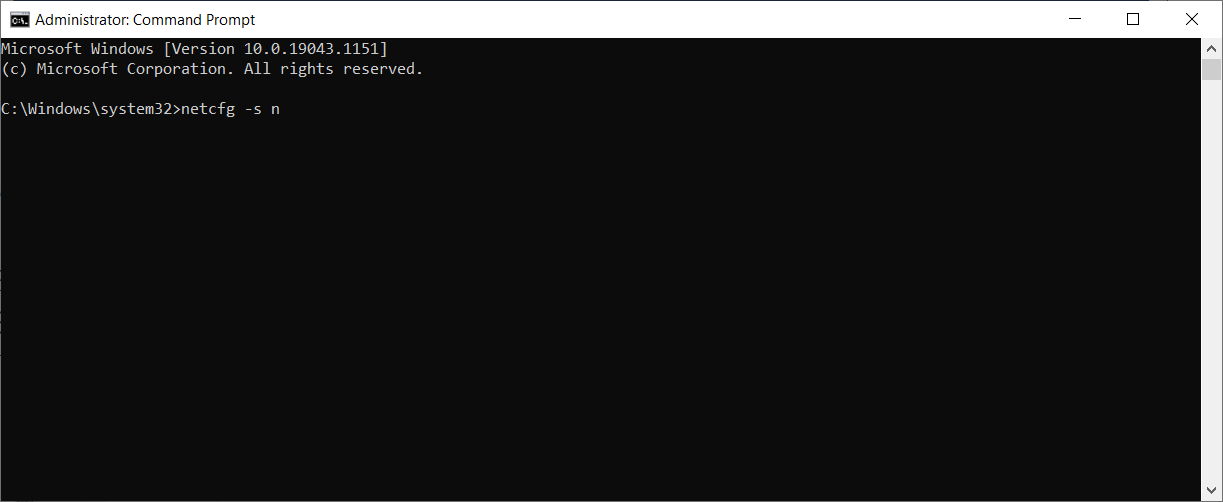
- This command will show a list of network protocols, drivers and services. Check if DNI_DNE is in the list, if it is, then you have a problem.
- If DNI_DNE is listed, in the same Command Prompt window type the following line and press Enter:
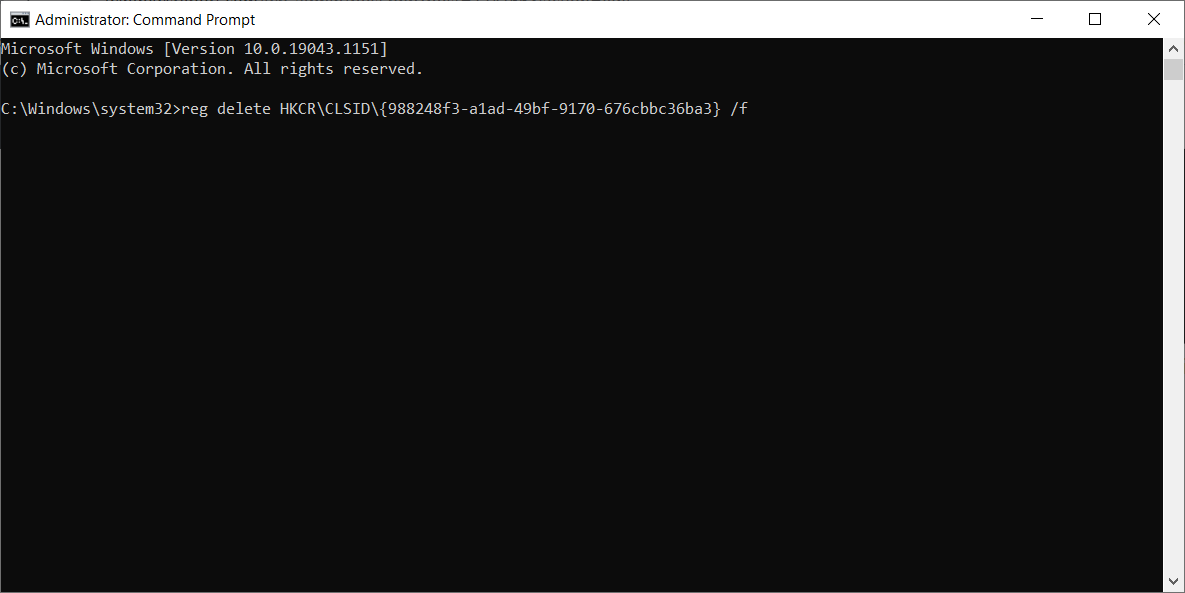
-
reg delete HKCR\CLSID{988248f3-a1ad-49bf-9170-676cbbc36ba3} /f -
netcfg -v -u dni_dne
-
This should solve the issue, but if you receive the error 0x80004002 after entering the command, then this value needs to be deleted slightly differently.
Here's what to do, if you receive this error code:
- Go to Search, type regedit and open the Registry Editor.
- Navigate to the following path:
HKEY_CLASSES_ROOT/CLSID/{988248f3-a1ad-49bf-9170-676cbbc36ba3} - Delete DNI_DNE if it still exists.
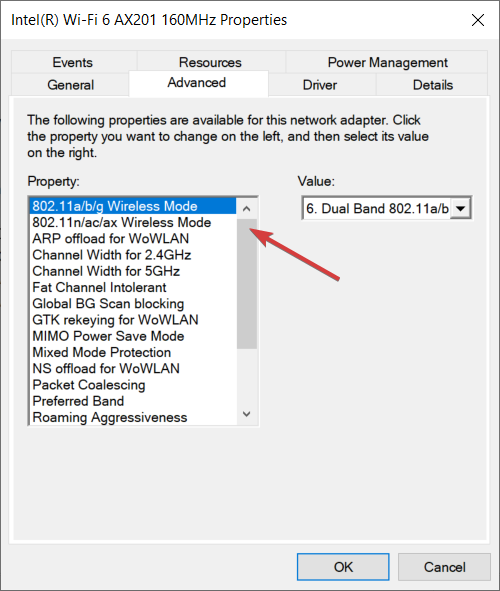
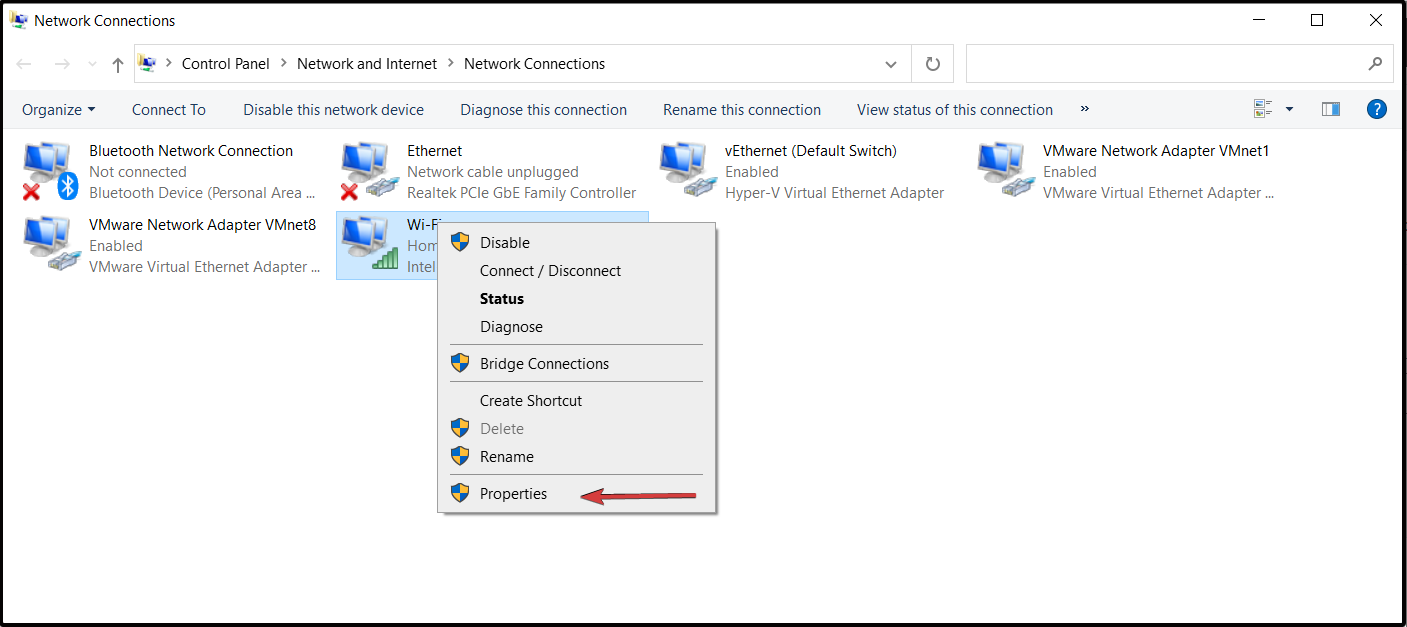
5. Change the adapter settings
- Click on the Start button, type control panel in the search tab and click on Control Panel from the results.
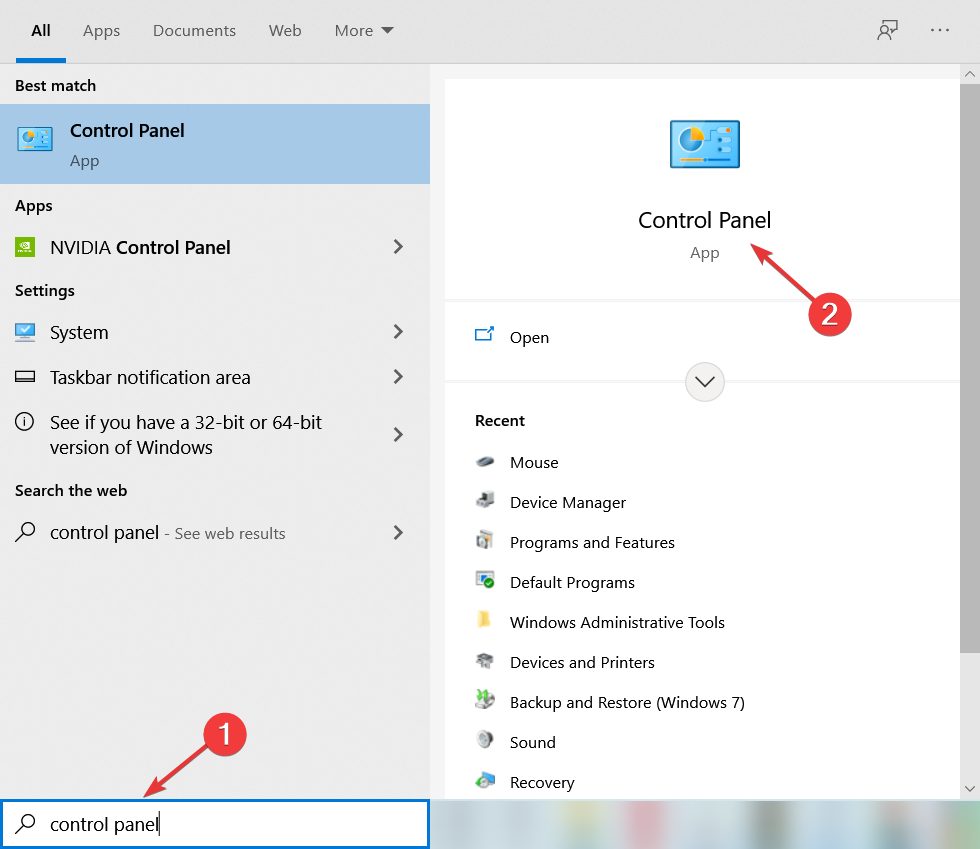
- Select Network and Sharing Center.
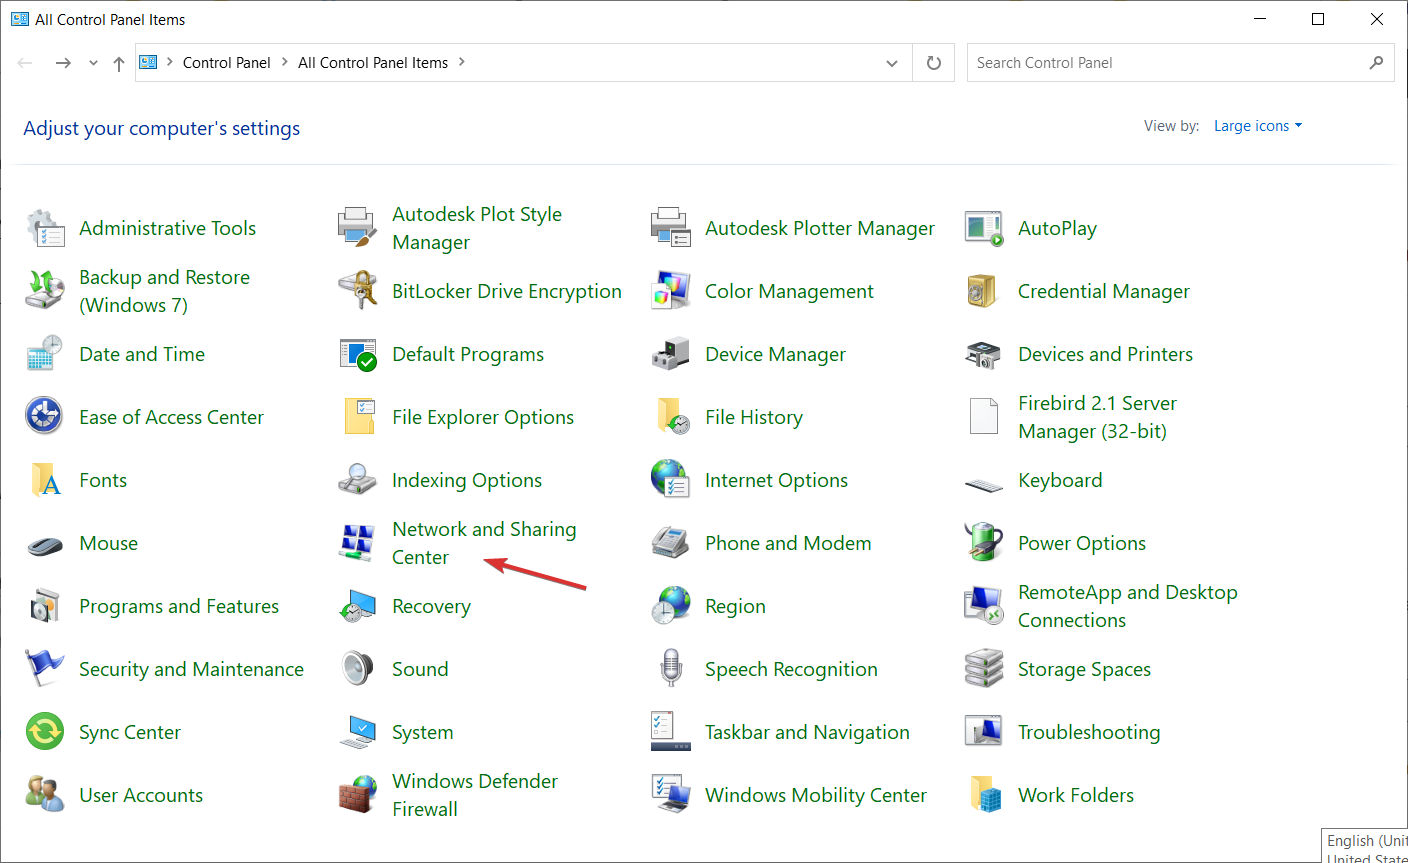
- Click on Change adapter settings.

- Right-click the wireless adapter and select Properties.
 .
. - Search for theInternet Protocol Version 6 (TCP/IPv6) under the options that show up and uncheck IPv6 to disable it.

- Click onOK and restart the computer to enforce the changes you made.
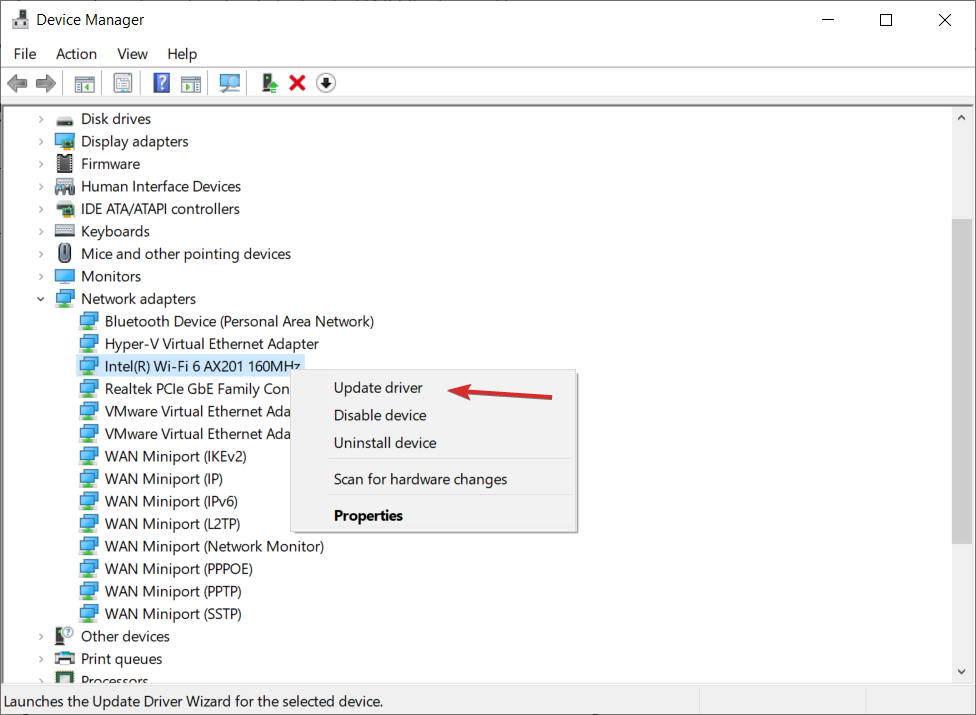
6. Reinstall the network adapter
- Right-click the Start button and chooseDevice Manager from the list.

- Click on the Network adapters section to expand it.
- Right-click your network adapter and selectUninstall device.
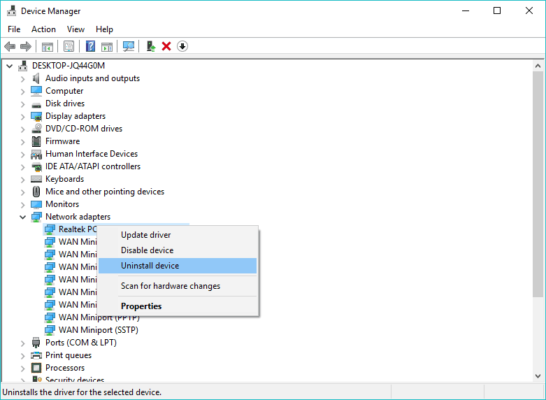
- Follow further on-screen instructions.
- Restart your computer.
- Now, go on and install the network adapter driver once again, as shown in the first solution.
7. Reset your router
NOTE
After you reset your router, you must reconfigure it. Therefore, before resetting it, take notes on the present configuration.
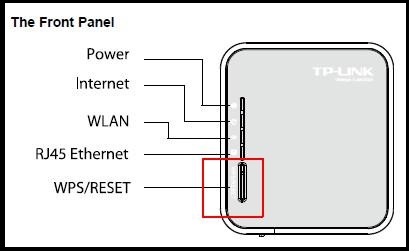
- Look for the Reset button at the back of the device.
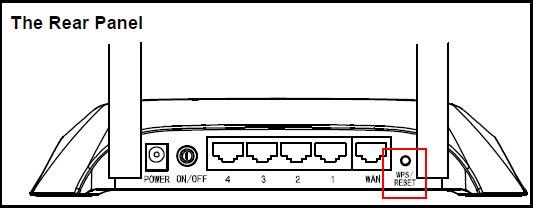
- Press and hold it for more than 10 seconds, until the SYS led starts flashing quickly and release the button.
Resetting your network adapter can do wonders, as cliche as it sounds. So, find the instructions that apply to your router.
We included a guide on how to reset a TP-Link router but the procedure for your router may be different so consult the manual of the device or the manufacturer.
8. Update the router firmware
- Use an Ethernet cable to connect the router to your PC.
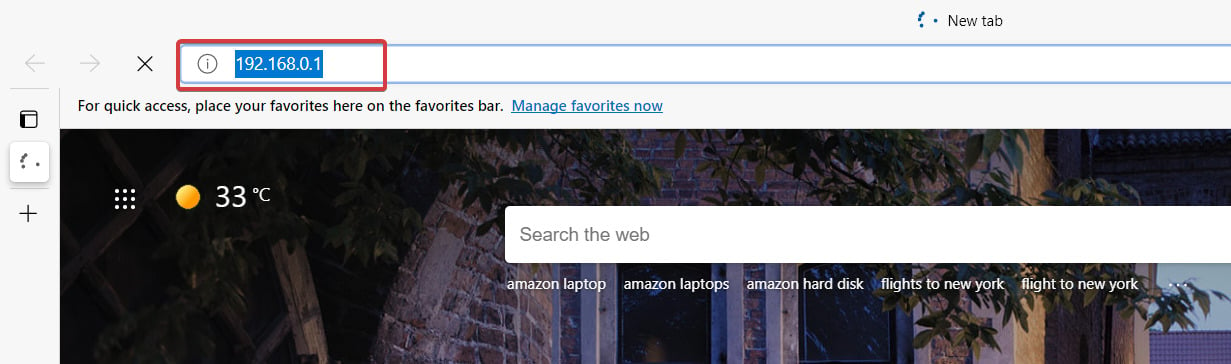
- Open your web browser and type the IP address or the link of the router (as an example, our router's IP address is 192.168.0.1 but yours may be different).
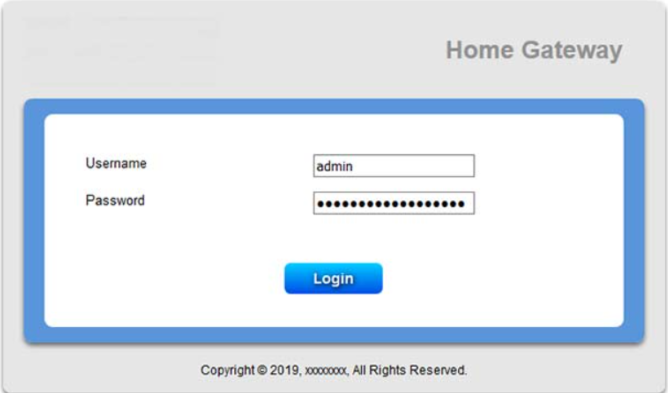
- Now enter the username and password provided by the manufacturer (in the manual or on the bottom of the device) or the ones you set the last time if you've changed them in the meantime.
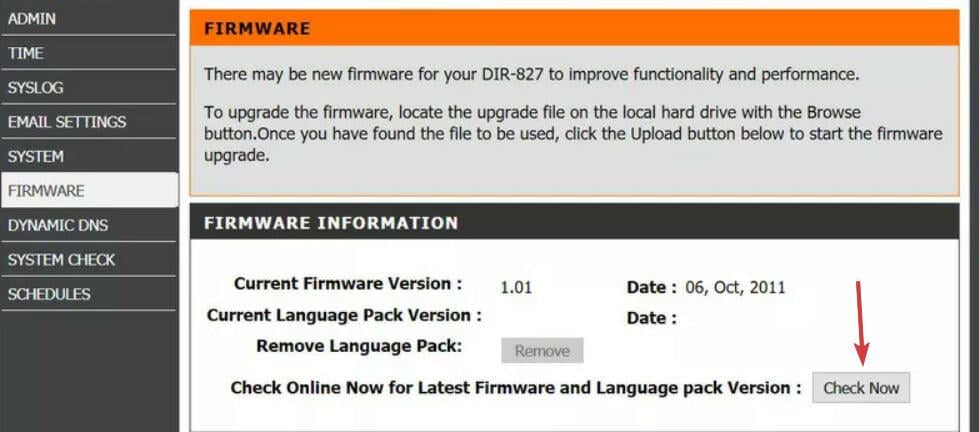
- Open the Firmware section to find the version number and note it down. In other routers you may find the firmware number in other menus so check them until you locate it. Some routers also have a Check button that will take you right at the manufacturer's firmware update page.
- Go to your manufacturer Support page, locate the newest firmware and download it.
- Up next, go back to the router interface in the Firmware section and find the Choose file or Browse button that will let you add the firmware you've downloaded.

- Wait for the process to finish and avoid interrupting it.
Updating your router firmware may resolve the problem, but it's by no means a simple procedure.
So, your best bet is to check your router's user manual for additional instructions on how to update it. If you can't find the printed or the online manual, call the manufacturer for assistance.
Just bear in mind that if you don't update the router properly, you can damage it permanently. So, proceed with extra care.
We also have a more detailed guide on how to update your router firmware for more router brands, so you might want to take a closer look.
9. Switch to the Maximum Performance mode
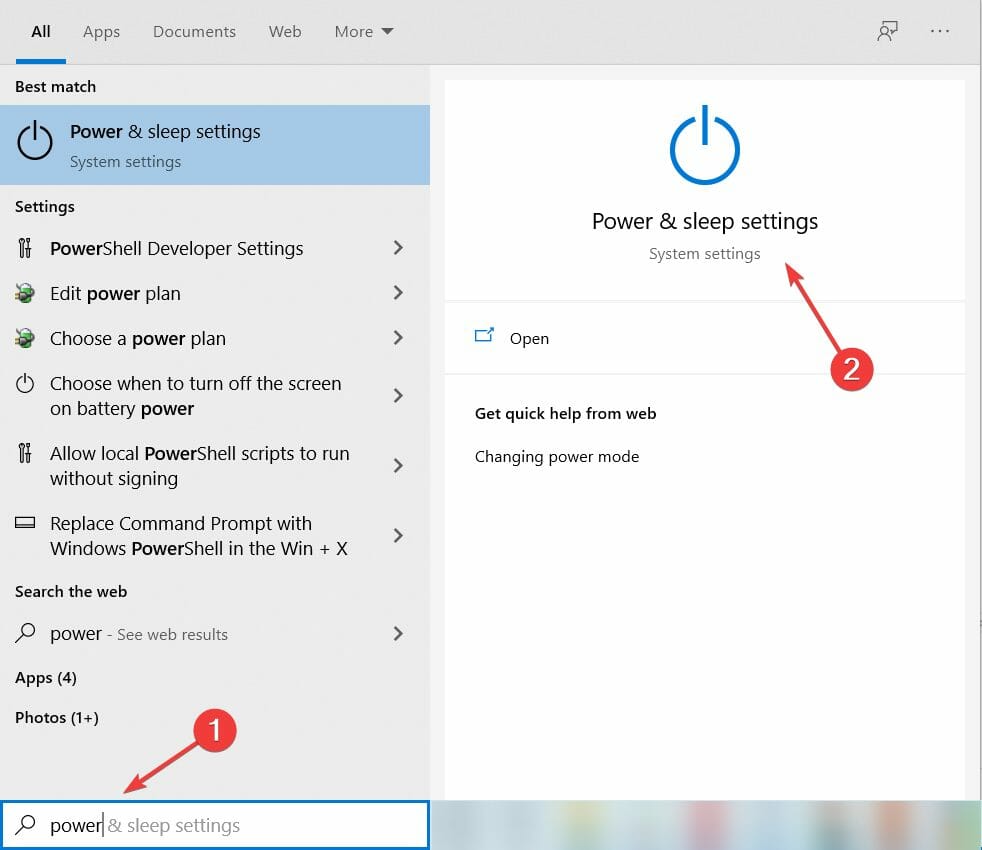
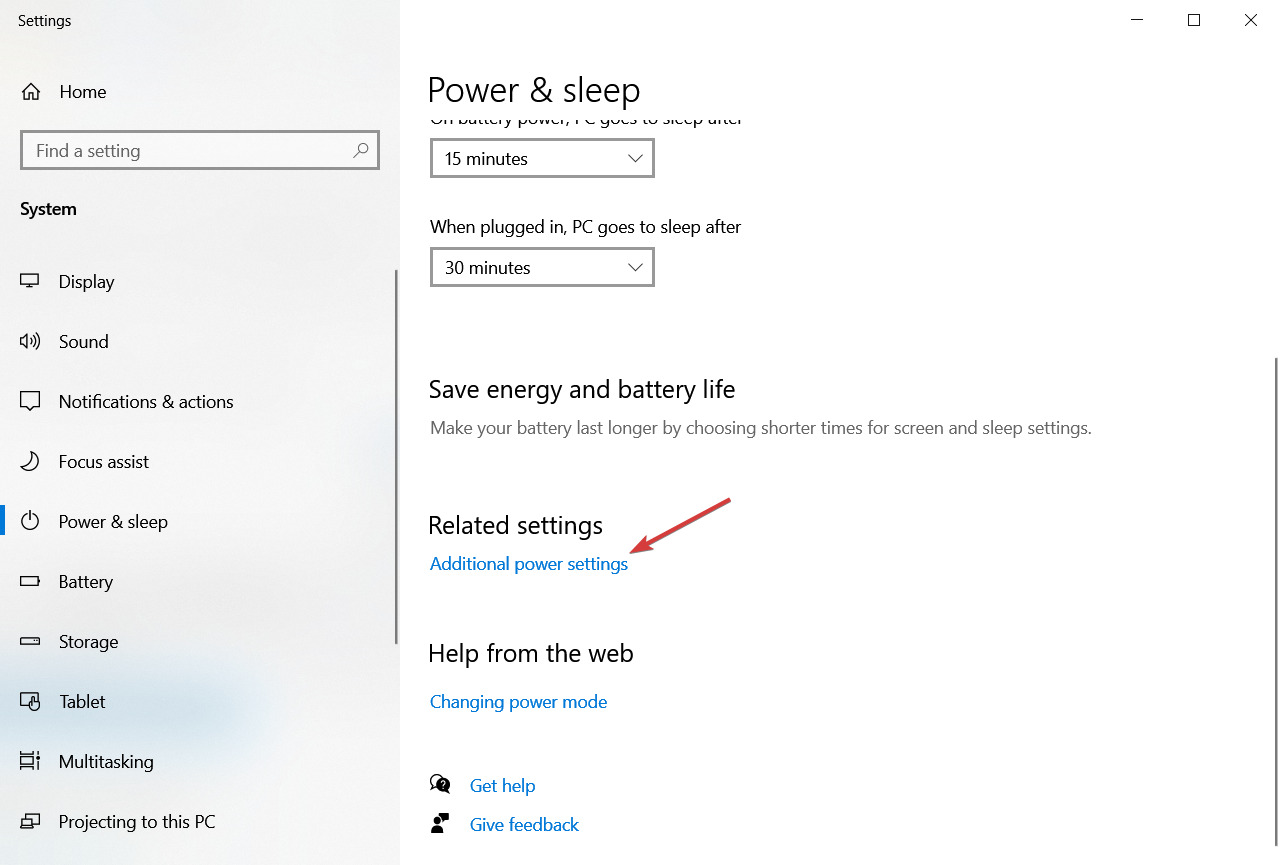
- Click the Start button, then type power management in the search tab, and open Power & Sleep.
- UnderRelated Settings, go toAdditional Power Settings.
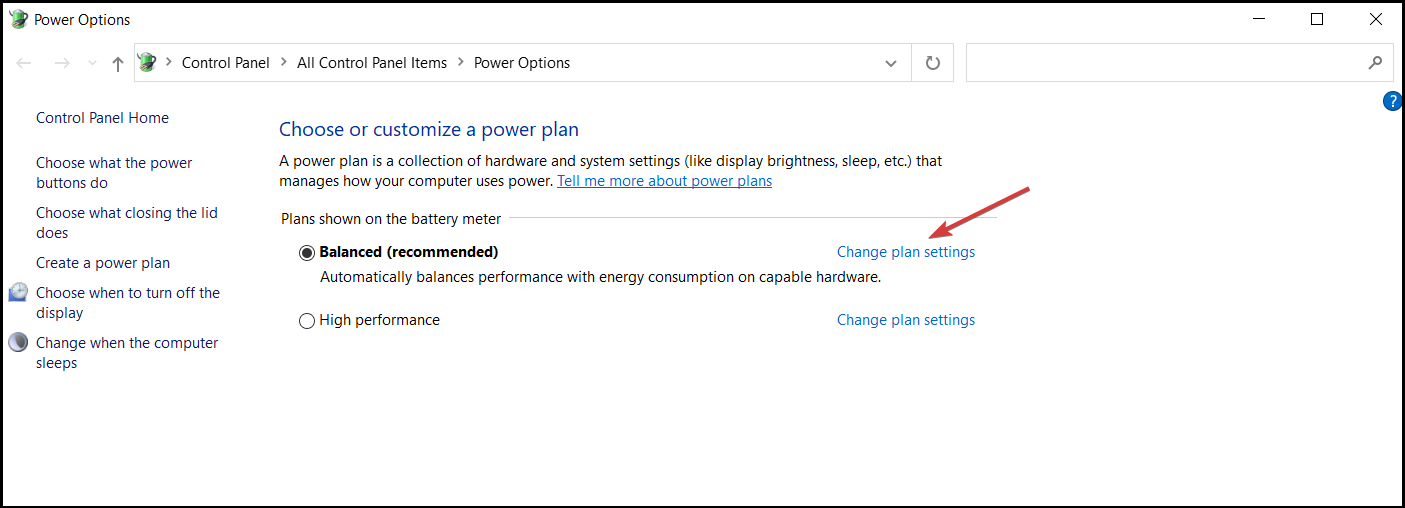
- Once thePower Options window opens, locate your current plan and clickChange plan settings.
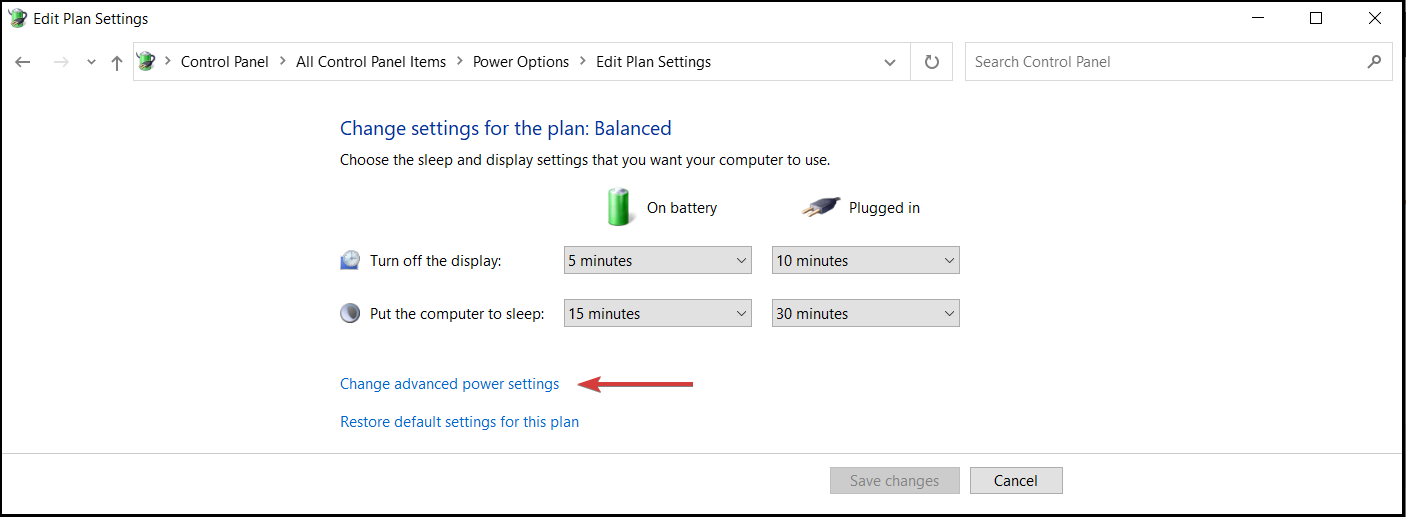
- Go toChange advanced power settings.
- LocateWireless Adapter Settings and set thePower Saving Mode toMaximum Performance.
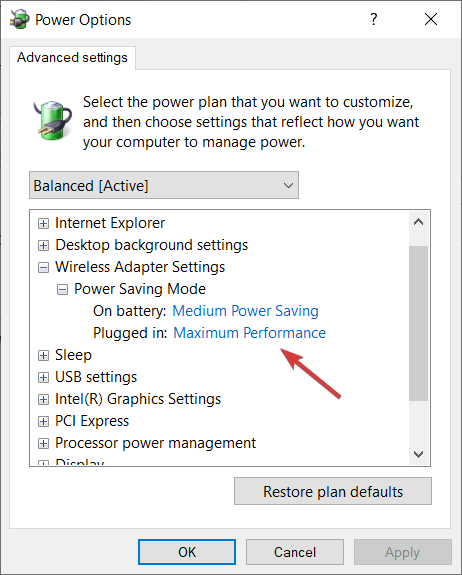
- ClickApply andOK to save the changes.
Just keep in mind that the Maximum Performance mode will put some extra pressure on your device, so your laptop battery might last shorter.
10. Clear any Wi-Fi signal disruptions
Some appliances and hardware not related to your computer can disrupt the Wi-Fi signal. For example, it's known that microwave weakens the signal.
So, make sure you don't have any appliances that can possibly disrupt the signal near your router.
How to avoid Wi-Fi connection problems
➡ Choose a less crowded channel
Expert Tip: Some PC issues are hard to tackle, especially when it comes to corrupted repositories or missing Windows files. If you are having troubles fixing an error, your system may be partially broken. We recommend installing Restoro, a tool that will scan your machine and identify what the fault is.
Click here to download and start repairing.
Changing the wireless channel on your router can make a big difference in avoiding traffic and connection problems.
For that, you only need to visit the wireless settings from the configuration menu of your router and you will usually find them in the Advanced settings section.

Now you only need to select the Channel menu and change it to a value instead of leaving it on automatic, just like in the screenshot above.
Of course, the settings on your router may be different, so check the instructions in the manual of your product.
➡ Move between 2.4 GHz and 5 GHz
If you have a dual-band router, it's can be a good idea to switch between the two frequencies.
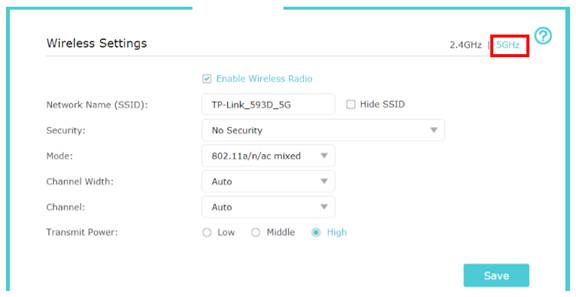
You can usually find the frequency settings in the Wireless Settings menu on your router, just like in the image above.
Just like we mentioned before, they may differ on your device. Therefore, feel free to consult the manual of your device.
➡ Remove unwanted devices
You might have forgotten that you gave the router password to some friends and especially neighbors that may still connect to your Wi-Fi network.
To get them off your network, go into your router's settings, look for connected devices, and delete the ones you don't recognize.
➡ Upgrade your device (change your Wi-Fi card)
The Wi-Fi card or adapter is usually embedded in your motherboard but that doesn't mean that you can't use an external one.
If you reach the conclusion that the one you have is not working properly, you can go for a new Wi-Fi adapter that will fit your needs better.
➡ Get the right router for your needs
When we're talking about your home network, make sure that the router can provide signal coverage wherever you are in the house.
If the connection keeps failing from time to time, it's either a problem with the router itself or the signal power to your device.
You can even choose one of the best routers with an internal antenna but remember to stay with your device within range.
➡ Keep your drivers updated
As you've read in our guide, drivers can cause a lot of mess when it comes to Wi-Fi adapters, and not only, so it's ideal to keep them updated at all times.
➡ Pick the right Wi-Fi hotspot
Although it may sound hilarious, sometimes we can connect to another network by mistake, a slower or a more crowded one.
So, make sure you connect to the fastest network available, preferably your own network, as the neighbors might not be so happy that you hook to theirs for a change.
We all have, at some point, problems with the Wi-Fi hotspot but they are usually caused by signal issues or the ISP itself.
That is why, when you encounter an Internet connection problem, you first need to make sure that you have a correct link from the ISP and that your router or access point is working properly.
After that, check if other devices can connect to the Wi-Fi hotspot and if they do, then you can conclude that there might be a problem with your device.
As a basic rule, troubleshoot the most common possible issues and gradually move on to the more complex ones.
If you didn't manage to solve the problem after performing all of these solutions, check our article about Internet problems in Windows 10, and you'll find more useful tips and tricks there.
In case you have any comments, questions or suggestions, just let us know in the comments down below.
Frequently Asked Questions
-
You can tweak its settings (TCP/IPv6) or completely reinstall the adapter. For a clean install, make sure you remove all leftovers by using a specialized uninstaller tool.
-
The Wi-Fi adapter usually causes issues after a major Windows update. Alternatively, we have a complete guide on how to fix wireless adapter issues.
-
![]()
Newsletter
How To Fix Network Drivers
Source: https://windowsreport.com/wifi-adapter-not-working-windows-10/
Posted by: fordscance.blogspot.com
0 Response to "How To Fix Network Drivers"
Post a Comment